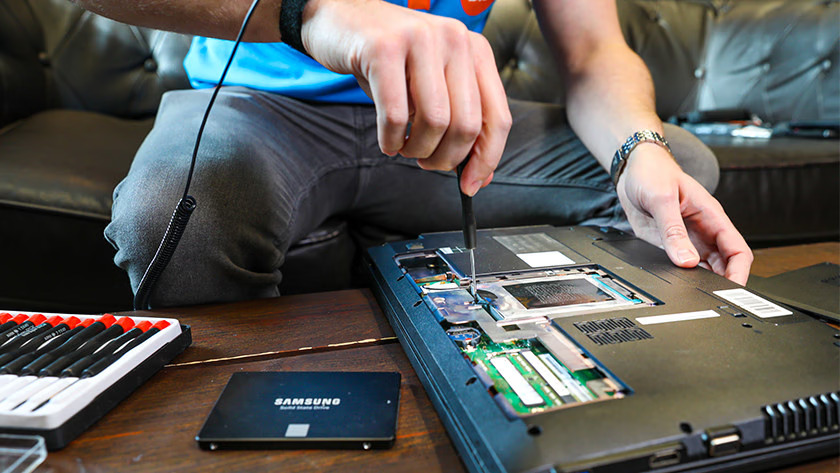
At Star Office International, we’re constantly focused on optimizing computer performance. Sometimes, it’s not immediately clear to users when their computer could benefit from a RAM or SSD upgrade. Even after identifying an issue, tackling it might seem daunting. That’s precisely why we’ve crafted this article: to provide a comprehensive guide on how everyday computer users can diagnose and resolve memory or storage issues themselves. By the time you finish reading, you’ll be equipped with the knowledge to confidently recognize when and how to upgrade your computer.
Step 1: Recognizing Signs of Performance Issues in Your Dell System
When you push your computer’s memory to its limits or rely on slow, traditional hard drives, you’re more likely to encounter performance issues. This is especially noticeable when engaging in activities like playing modern computer games or running intensive applications like Photoshop. These slowdowns can stem from various underlying issues, which we’ll address in the subsequent steps.
Step 2: Evaluating the Need for a Memory Upgrade
Assessing whether your computer’s performance issues stem from insufficient memory is crucial. This step involves determining if a memory upgrade is necessary to handle tasks such as gaming or running resource-intensive software like Photoshop effectively.
1. Physical Labels:
Look for stickers or labels on the exterior of your Dell device. For laptops, check the bottom cover, base, battery compartment, screen bezel, keyboard trim, or palm rest. Desktops may have labels on the top panel, back panel, or side panel of the tower case. All-in-one PCs typically have labels on the lower back or stand. Tablets may have labels on the screen or back panel.2. Dell SupportAssist:
If available, download the Dell SupportAssist app from Microsoft Store. Upon opening it, the product model of your system will be displayed.3. System Information:
For Windows users, press Windows + R to open the Run dialog box, type `msinfo32`, and press Enter. The System Information window will show details including the System SKU, which indicates your computer’s model name and number.4. Service Tag Lookup:
If all else fails, use Dell’s Service Tag lookup tool. Every Dell system has a unique Service Tag number, typically found on a label on the device. Enter this number on Dell’s support website to confirm your exact model number. Accurately identifying your Dell model number ensures you can confidently proceed to select and purchase the correct RAM upgrade for your specific system configuration.Step 5: Using the Configurator to Find Compatible RAM
Once you’ve identified your Dell model name or number, navigate to Kingston’s Configurator and enter it into the “Search by System/Device” box. This tool will provide you with a list of variations or the specific model alongside the brand name. Click on the relevant link to access detailed information about your Dell computer’s RAM capacity. Here, you’ll find Kingston part number listings and links to e-tail partners where you can purchase the recommended RAM upgrade. This ensures you select and install the correct memory for optimal performance.Step 6: Reviewing the System Results Page
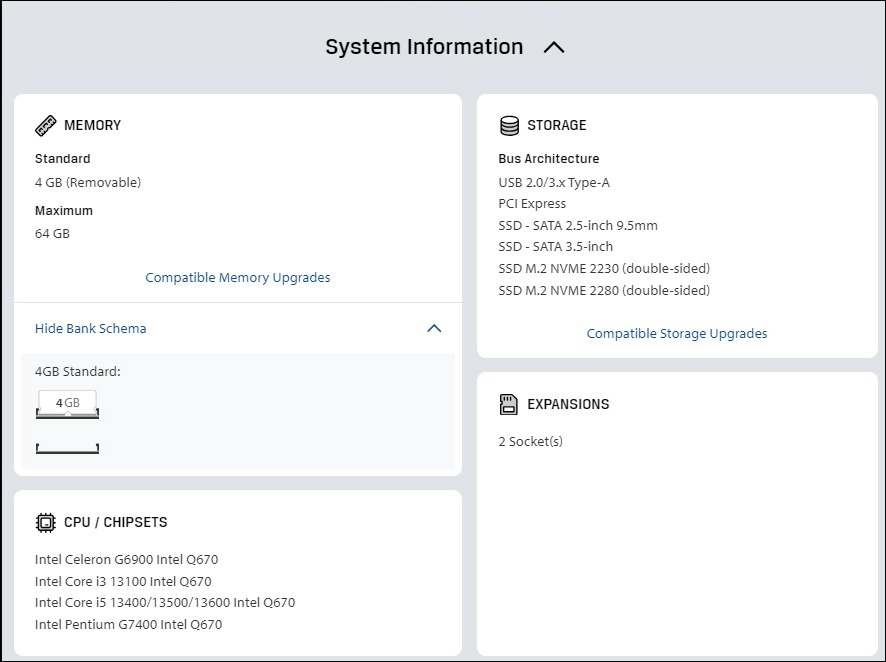 The memory section tells you two main things about your device’s memory: how much it comes with as standard, and whether you can add more. For example, some laptops have memory that’s fixed and can’t be changed. It also shows you the memory bank layout, which just means how the memory slots are arranged inside your computer.
The Configurator search will suggest memory that works with your system. Click on ‘Compatible Memory Upgrades’ or scroll down to see a list of memory options that are guaranteed to work. These options include links for purchasing through Kingston’s approved resellers. In some countries, you can also buy directly from the Kingston website.